Cakespy: Homemade Tagalong Girl Scout Cookies

Popular
Health score
1%
Cakespy: Homemade Tagalong Girl Scout Cookies
180 min.
36
210kcal

Suggestions


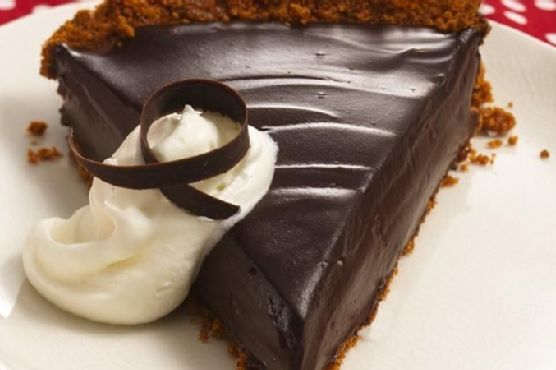
Are you ready to indulge in a delightful treat that brings back memories of childhood? Look no further than these Homemade Tagalong Girl Scout Cookies! With their rich, creamy peanut butter filling and a luscious chocolate coating, these cookies are sure to satisfy your sweet tooth and impress your friends and family.

This popular recipe is not only a fun baking project but also a fantastic way to recreate the beloved flavors of the classic Tagalong cookies right in your own kitchen. In just 180 minutes, you can whip up a batch of 36 cookies, perfect for sharing at gatherings or enjoying as a special dessert after dinner.

Imagine the joy of biting into a soft, buttery cookie topped with a generous dollop of smooth peanut butter, all enveloped in a decadent layer of chocolate. Each cookie packs a delightful combination of textures and flavors that will have everyone coming back for more. Plus, with only 210 calories per cookie, you can indulge without too much guilt!

So gather your ingredients and get ready to embark on a delicious baking adventure. Whether you're a seasoned baker or a novice in the kitchen, this recipe is straightforward and rewarding. Let’s make some memories with these Homemade Tagalong Cookies!

Ingredients

  • cup butter softened (2 sticks)
  • 0.5 cup powdered sugar sifted
  • 1.5 cups creamy peanut butter (no-stir type)
  • cups flour sifted
  • tablespoons cup heavy whipping cream 
  • 0.5 teaspoon salt 
  • 12 ounces bittersweet chocolate coarsely chopped
  • 0.5 cup sugar 
  • 0.5 teaspoon vanilla extract 

Equipment

  • bowl
  • frying pan
  • baking sheet
  • sauce pan
  • baking paper
  • oven
  • plastic wrap
  • double boiler
  • aluminum foil
  • stand mixer

Directions

  1. Prepare the cookie base. Using the paddle attachment in a stand mixer, cream the butter and sugar until light and fluffy.
  2. In a separate bowl, sift together the flour and salt. In 2-3 increments, stir into the butter mixture, scraping down the sides of the bowl occasionally.
  3. Add the cream and vanilla; stir only until incorporated.
  4. Wrap the dough in plastic wrap (separate it into two balls of dough if it is easier to handle that way) and refrigerate for 2-3 hours, until it is very firm.
  5. Preheat the oven to 350°F. Line two baking sheets with parchment paper.
  6. Pinch off pieces of dough, and roll into approximately 1-inch circles. Lightly flatten each ball with your hand, trying to ensure that the edges don't crack too much.
  7. Place the rounds of dough on the prepared cookie sheets, leaving about an inch between (they will spread a little, but not too much).
  8. Bake for 10-12 minutes, or until they have a dull finish on top and are just golden on the edges.
  9. Remove from oven and let cool for about 5 minutes on the sheet. As soon as they are not too hot, using a thumb or the back of a small spoon, make an indent in each cookie (they should still be fairly soft, so it should be easy to indent them without breaking them). Leave them right where they are for the moment.
  10. In a medium saucepan, melt the peanut butter on low heat until it is a thick, easily stirred liquid.
  11. Add the confectioners' sugar and stir until incorporated.
  12. Add the vanilla last, stirring in until incorporated.
  13. Remove from heat.
  14. Let it sit for about 10 minutes; the mixture will start to thicken a bit.
  15. Place a teaspoon (a little more or less, upon your taste) of the peanut butter mixture in the indent on each cookie.
  16. It would be best to use a double boiler to melt your chocolate at this point. Personally, I do not have one, so I melted it directly in a medium saucepan on low heat, stirring very frequently to keep the mixture from scorching the bottom of the pan.
  17. To coat the cookies, hold each cookie on a fork (so that it is sitting on the tines) with one hand, and with your other hand, using a spoon, let the chocolate mixture drip on top of the cookie until coated. Use your spoon to gently "scrape" the coating so that it covers the entire cookie; let some of the excess chocolate drip off, and then place the chocolate coated cookies on a sheet of waxed paper, nonstick silicone, or even aluminum foil, and let set for 2-3 hours before enjoying.

Nutrition Facts

Calories210kcal
Protein7.05%
Fat61.12%
Carbs31.83%

Properties

Glycemic Index
5.81
Glycemic Load
6.04
Inflammation Score
-3
Nutrition Score
4.7400000384482%

Nutrients percent of daily need

Calories:209.55kcal
10.48%
Fat:14.61g
22.47%
Saturated Fat:6.61g
41.32%
Carbohydrates:17.11g
5.7%
Net Carbohydrates:15.66g
5.69%
Sugar:9.05g
10.06%
Cholesterol:15.07mg
5.02%
Sodium:120.34mg
5.23%
Alcohol:0.02g
100%
Alcohol %:0.06%
100%
Caffeine:8.13mg
2.71%
Protein:3.79g
7.58%
Manganese:0.33mg
16.53%
Vitamin B3:1.92mg
9.61%
Magnesium:36.52mg
9.13%
Copper:0.17mg
8.68%
Vitamin E:1.19mg
7.95%
Phosphorus:70.51mg
7.05%
Iron:1.11mg
6.17%
Fiber:1.46g
5.84%
Folate:22.18µg
5.54%
Selenium:3.7µg
5.29%
Vitamin B1:0.07mg
4.86%
Zinc:0.58mg
3.87%
Vitamin B2:0.06mg
3.77%
Potassium:124.12mg
3.55%
Vitamin A:174.55IU
3.49%
Vitamin B6:0.05mg
2.72%
Vitamin B5:0.18mg
1.82%
Calcium:14.3mg
1.43%
Vitamin K:1.2µg
1.14%