Homemade Yogurt

Vegetarian
Gluten Free
Health score
8%
Homemade Yogurt
45 min.
4
151kcal

Suggestions


Are you ready to embark on a delightful culinary adventure? Making your own homemade yogurt is not only a rewarding experience but also a fantastic way to enjoy a healthy, delicious treat that you can customize to your liking. This vegetarian and gluten-free recipe is perfect for anyone looking to add a nutritious option to their morning meals, brunches, or breakfasts.

In just 45 minutes, you can create creamy, rich yogurt that boasts a mere 151 calories per serving. Imagine the satisfaction of knowing exactly what goes into your yogurt, free from preservatives and artificial ingredients. Plus, the process is simple and requires minimal equipment, making it accessible for both novice and experienced cooks alike.

Whether you prefer it plain, with fresh fruits, or as a base for smoothies, homemade yogurt is incredibly versatile. You can even experiment with different flavors and textures, from thick Greek-style yogurt to a lighter, tangy version. The best part? You can control the fermentation time to achieve your desired taste and consistency, allowing you to create a yogurt that’s uniquely yours.

So, gather your ingredients and equipment, and let’s dive into the world of homemade yogurt. Your taste buds will thank you!
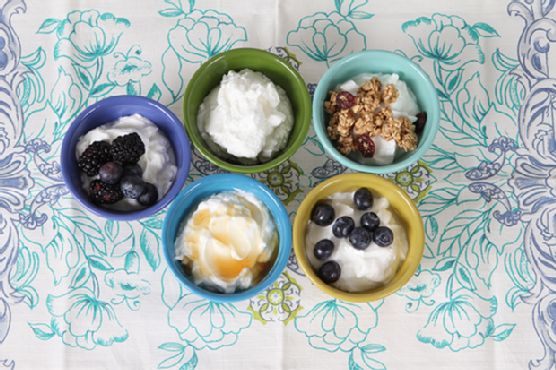
Ingredients

  • quart milk 
  • tablespoons powdered yogurt starter plain homemade (purchased or ) (amount specified on package)

Equipment

  • bowl
  • ladle
  • whisk
  • pot
  • microwave
  • measuring cup
  • kitchen timer
  • colander
  • cheesecloth
  • candy thermometer

Directions

  1. Start by cleaning and sterilizing all your equipment and tools as well as your work surface. Most utensils and storage containers can be sanitized in the dishwasher (some machines have a sanitize setting). Alternatively, sterilize everything in boiling water.
  2. Prepare an ice bath, filling a large bowl or sink with ice.
  3. Attach a candy thermometer to a heavy, large pot and add the milk.
  4. Place the pot over moderate heat and heat the milk until it reaches at least 180°F or boils, stirring occasionally to prevent a skin from forming and making sure the milk doesn't scald or boil over. Alternatively, place the milk in a large microwave-safe bowl or a large glass measuring cup with a spout (for easy pouring) and microwave it in 2- to 3-minute intervals, until it reaches 180° or boils.
  5. Remove the milk from the heat and allow it to cool to 110°F to 115°F. To speed the cooling process, place the pot in the prepared ice bath and stir the milk occasionally. (If the milk temperature drops too low, return it to the heat.)
  6. If using yogurt as a starter culture: In a small bowl, combine about 1 cup warm milk with the yogurt and stir to combine.
  7. Add the yogurt-milk mixture to the remaining warm milk and stir until completely incorporated. Do not stir vigorously.
  8. If using a powdered yogurt culture: Follow the manufacturer's instructions and add the specified amount of powdered culture to the warm milk; whisk until completely incorporated. Do not stir vigorously.
  9. Pour or ladle the mixture into the yogurt maker containers or another incubator (if using a thermos, first warm the inside with hot tap water) and incubate between 110°F and 115°F for 5 to 10 hours, depending on the desired flavor and consistency—longer incubation periods produces thicker, more tart yogurt. Do not disturb the yogurt during incubation.
  10. Cover the yogurt and refrigerate until cold, 2 to 3 hours. (If you used a thermos to incubate, transfer the finished yogurt to a non-insulated container for chilling so the temperature will drop.) Stir any flavorings into the yogurt just before serving. (For thicker, Greek-style yogurt, after incubation, spoon the yogurt into a cheesecloth-lined colander set over a bowl and let it drain, covered in the refrigerator, for at least 1 hour or overnight. Discard the whey that drains out of the yogurt or reserve it for another use.)
  11. Yogurt can be stored in the refrigerator, in covered glass, ceramic, or plastic containers, for up to 2 weeks, but the flavor will be the best during the first week. As yogurt ages, it becomes more tart. If more whey separates out of the yogurt, just stir it back in before serving.
  12. • Yogurt needs to incubate for at least 5 hours, but it can safely incubate for much longer, even overnight. If you're using a yogurt maker with a timer and you set it for a shorter incubation (5 hours, for example), it's fine to let it sit there for several more hours. The same is true for a thermos or other incubation method; just keep in mind that the longer the incubation period, the thicker and more tart the final yogurt.• The whey that drains from the yogurt is full of vitamins and minerals and can be added to smoothies and lassis, used as a cooking liquid, or made into a simple drink with a bit of sugar or salt.• As an alternative way to thicken yogurt, whisk in 3 or 4 tablespoons nonfat powdered dry milk when you add the starter.• This recipe may be doubled or tripled; increase the amount of starter and milk proportionately.

Nutrition Facts

Calories151kcal
Protein21.7%
Fat47.51%
Carbs30.79%

Properties

Glycemic Index
14.25
Glycemic Load
4.33
Inflammation Score
-4
Nutrition Score
8.110869516821%

Nutrients percent of daily need

Calories:151.1kcal
7.56%
Fat:8.06g
12.4%
Saturated Fat:4.71g
29.47%
Carbohydrates:11.75g
3.92%
Net Carbohydrates:11.75g
4.27%
Sugar:12.08g
13.42%
Cholesterol:30.34mg
10.11%
Sodium:96.8mg
4.21%
Alcohol:0g
100%
Alcohol %:0%
100%
Protein:8.28g
16.56%
Calcium:309.15mg
30.92%
Phosphorus:253.2mg
25.32%
Vitamin B12:1.33µg
22.22%
Vitamin B2:0.35mg
20.46%
Vitamin D:2.62µg
17.45%
Potassium:378.13mg
10.8%
Vitamin B5:0.94mg
9.41%
Vitamin B1:0.14mg
9.12%
Vitamin A:398.12IU
7.96%
Magnesium:30.19mg
7.55%
Vitamin B6:0.15mg
7.46%
Zinc:1.06mg
7.06%
Selenium:4.83µg
6.89%
Vitamin B3:0.26mg
1.3%
Source:Epicurious